|
REWIRING CHEAP CHRISTMAS LIGHT LED STRINGS FOR LOW VOLTAGE USE
Cheap strings of molded LED Christmas tree lights are finally hitting the market in quantity. Cheap as in $14-$20 a string, depending on color. Under $30 for a string of 70 - 100 white ones.
I used to pay over $2.00 each for white and blue LEDs and many of you are still paying over 75 cents for a single white LED, so the implications of hundreds of 10 cent LEDs
mounted in durable water-tight injection-molded sockets with insulated wire tails is not likely to escape you. For sources, if you can't find them at Fred Meyer or Target, or don't want to expose yourself to that side of American culture, or just want to support online businesses and FedEx, try Inirgee (not
exactly an endorsement, but I have done business successfully with the folks at Inirgee: we called in an order at the very last minute and they got the stuff to us in time for the Festival. And I am now engaged in a fascinating dialogue with Tom Tsao, one Inergee's owners, about the conditions under which their Forever Bright Christmas light strings are manufactured that will soon make its way to this page. Their website is now quite well organized, from my POV,
and some of their products are definitely cool. Dig deep.
Unlike traditional green plastic incandescent Christmas tree lights, which have a multi-part plug socket arrangement at every lamp to allow replacement of the incandescent bulb when it breaks or the filament pops, these sets are injection molded, with an LED sealed up in the middle of two shots of resin.
Farther down the page I will show how to retrofit the more traditional incandescent strings with LEDs, because those old plug and socket strings are both ubiquitous and versatile but for now, I am focusing on getting you "up to speed" on understanding how to wire LEDs into strings for various supply voltages, and adding the steps involved in replacing the incandescent bulbs with LEDs just increases the complexity of the project.
Here is how we rewired the cheap 120vac series-wired LED strings for Festival of the Forest. We used the antique candle-light and 4-color mini-ice strings that we got from inirgee and other sources and rewired the socketed LEDs into parallel and series-parallel strings for light toys, balls, parasols, etc. The instructions also show where (and why) we put the batteries and resistors in the circuits to provide the correct power supply voltages and currents that various LED colors require.
|
|
Yes, it was quite a bit of work - that's why they make Christmas lights and most of the other crap you haul around in your pack in sweatshops in Asia - but in fact all you need to do this rework is a table, some yogurt tubs, some nail-clippers and some tape. Wire-nuts are a cool way to fasten stuff together. So is solder, but soldering irons are HOT. Soldering tools and soldering skills are therefore totally optional.
|
|
OVERVIEW
The goal from my POV is to get the current consumed in the diode relatively large - or at least exactly as bright as you want it to be - and the current that is wasted in the resistor relatively small, or at least as small as is practical.
This goal is obviously far more important when you are running off coin batteries or non-rechargable Lithium cells than when you are using rechargable AA NiMh or when you are running off 12
volt lead-acid car batteries in the RV (which should read something like 13.6 volts when fully charged)
|
|
 |
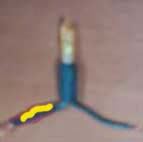
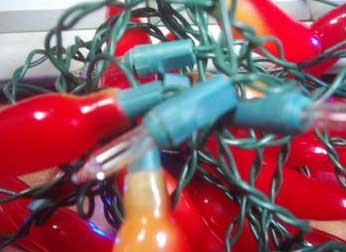
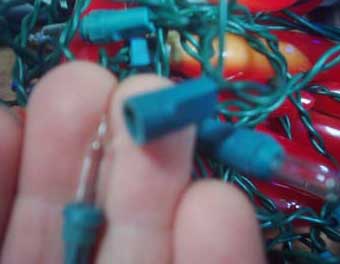
| There are 3 wires in a series LED String Clip out the individual LEDs leaving 2 wires attached.
Fiskars or nail-clippers work great for this. The stranded copper wire is very soft and it does not dull the scissors as fast as paper. I recommend making the lead-wires all about the same length at this stage.
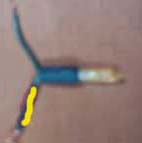
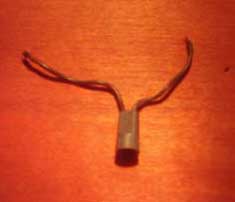
After you clip the LEDs out of the series strings, and before you do the POLARITY step, you need to strip the ends of the leads back so that you can connect them again. There are many ways to do this and all work, including fancy wire-stripper tools. I am old-school and so mostly I just use my teeth.
However you choose to strip the wires, you will end up with many short lengths of green plastic tubing. Keep them in a paper cup - you will need at least half of them later in the game. |
|
POLARITY
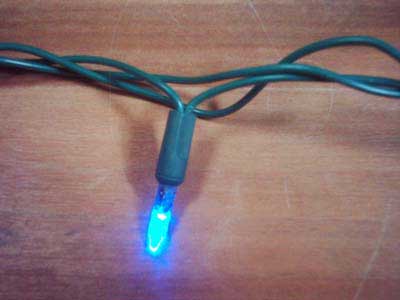
Before you can use the LEDs that you have cut out of the 120 vac series strings, you must polarize them. Actually they are already polarized - but the polarization is hidden inside - which is the reason that you have to mark them on the outside so that you can recognize their polarity and connect them correctly.
|
|
Marking the polarity requires a test fixture. I use a pair of C batteries, connected together in series by a few resistors, with an LED wired across the hot end of the batteries, right where the test leads attach, to let me know that the "power is on". it does not matter which side of the LED socket you mark - all that matters is that you ALWAYS mark the same side the same way. I do this by soldering wires to the battery with a clip on one wire and a bare end on the other. When an LED socket is correctly connected, the LED lights up and I mark the side where the clip is attached. Make sure you use something that makes marks that are really easy to see.
|
|   |
|
ECONOMIC CONSIDERATIONS
Each 120 vac mini-ice Christmas Light string gives close to 100 of these socketed LEDs, so the unit-cost of an LED with a diffuser and a cool easy-to-handle package is very very low. Like 15 cents each.
The 4 color strings give you a nice assortment of RED, GREEN, BLUE, AND PALE YELLOW LEDs. I pay between 7 - 20 cents each for high brightenss LEDs, depending on color and package, but 14 cents each is less than people would charge you for the diffuser alone, and the socket is vibration-proof, water-resistant, already attached to wires, already attached to the LED, and at this price, it's a freebee.
|
|
OPERATING VOLTAGE CONSIDERATIONS
If you run a single 20 ma 2 volt yellow or red LED off a 12 volt supply (10 AA NiMh batteries) you need a 570 ohm resistor, but that gives you 20 mw to make light in the diode (it will run very bright at 20 MA) and 179 mw of wasted heat in the resistor. Better to connect six 2 volt LEDs in series for 12 volts - then all the current goes into making light and almost none is lost in heat.
|
|
EXAMPLES
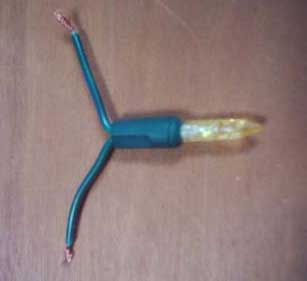
Here is a series string with 6 yellow 2.0 volt junctions, each junction dissipates 20 ma at 12 volts at full brightness. Which means the whole string of 6 LEDs draws far less current than a single light in an incandescent string
|
|
CURRENT LIMITING RESISTOR CONSIDERATIONS
|
|
My preference is to put the resistors between the cells of the battery pack, whenever possible. Reasons are simple: a resistor between the cells of a multi-battery power-pack can function to limit current available from the cells, which means it not only controls the brightness of the LED, but more importantly the rate of discharge from the battery pack.
When you start playing funky wiring attached to high-current-capacity power sources like D cell packs, surplus Lithium Ion batteries, or car batteries in RV's and motorbikes, this becomes a safety issue, and even if all you are dealing with is watch batteries in costume parts, limiting dicharge rate matters. If the wiring shorts somewhere, you don't lose your batteries in a puff of foul smoke, all that happens is a few of the lights go out.
Here is the game: for the batteries above: for a single 2 volt LED, one 47 ohm rsistor gives 20 ma and drives the LED at full brightness. You could hang 2 LEDs in parallel on this resistor and still get 20 ma through the circuit. And the LEDs would each be driven at about half-bright. Or you could put a resistor on each LED to get them each full bright, OR you could put two resistors in parallel, right at the batteries. Which is what I recommend. This means that you can set the battery pack for the brightness you think you need by starting out with the right resistance value and then making minor adjustments.
Choosing the right resistor(s) for your light toy is really easy if you understand how to use the online current-limiting resistor calculator that Rob Arnold put up - I have a link to it near the top of my slice through the internet page so if you lose the bookmark or lose this page, you can find it on my site. The basic rule of thumb is that a single 47 ohm resistor will drive a 2 volt LED from a 3 volt source at 20 ma. A pair of 47 ohm resistors in parallel is worth 24 ohms (47 divided by 2) three is worth 18 ohms (47 divided by 3).
|
|
MIXING LEDs WITH DIFFERENT VOLTAGES
Since you cannot necessarily safely mix diodes with different junction voltages on a
series string, you can mix colors that use different voltage diodes 2 ways: either as separate diodes, each with its own resistor(s) to set the brightness of that color, or as parallel groups of series strings of different colors. That is how we did it at FOTF.
|
|
EXAMPLES
Two (or more) groups of colored LEDs (imagine purple and gold, or purple and red, or
white and green) with each color a series-set wired off its own resistor(s),
with the series strings connected to the power source with a common wire.
On a few really cool toys where the balance of brightness between colors
really mattered, we used a tiny variable resistor in series with the current
limiting resistor so we could reduce the brightness of one color after the lights were installed. After that we could measure the resistance and make more like it, using fixed resistance values.
|
|
BUILDING LIGHT FIXTURES
Working with inirgee's mini-ice packaged LEDs is pretty easy compared to working with bare LEDs, because each LED is encased in a molded plastic diffuser, but most LEDs come packaged in a lens that directs the majority of the emitted light right out the end. This is a mixed blessing unless you want to shine light on something to illuminate it, like a sign. For the moment, I am going to assume that it is a benefit taht you are using bare LEDs, and that you have some objsect that you need to illuminate from within.
You clearly need something that is ubiquitous and extremely easy to work with. I recommend plastic PET drinking water bottles (or pop bottles if you have a way to wash the sugar out of them). they offer many advantages over everything else, including stiff wire. For starters, the come in a wide range of sizes, nifty colors (clear, green, blue, etc.) and they offer multiple angles.
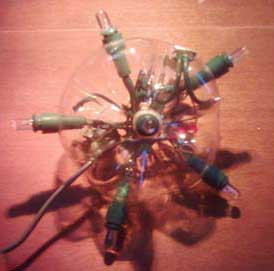
Mounting the LED in the bottle is easy in principle - you just punch a hole and stick the LED thru it. In fact, this can be tricky, becasue you really ant to be able to prewire the LED strings and then install them in the fixtures and it took a 12 year old boy Jake Moulton to show us the trick for mounting odd-sized objects in imprecise holes. I have no idea where he saw the ide first, maybe the push on axle-caps on some toy he had a child, but he watched us struggling to make accurate hols and pointed out that a cluster of 4 holes would create an opening with barbs that held the LED and he was right.
For most of the installations at FOTF we used the bottom of the bottle, like a cup, with holes punched around the sides for the LEDs. Some installations wanted the light to shine obliquely, and for these we used the necks of the bottles with LEDs pointed out radially, which allowed the light to point obliquely up or down. Tiers of these bottle parts could be hung from one wire, sending light up, down and out.
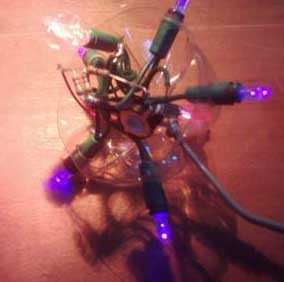
The other way to hang the bottle parts that worked extremely well was to hang the fixture perpendicular and in some cases, we added LEDs pointed out from the bottle's long axis, which is what you are seeing below:
 sheer scrim diffuses the light sheer scrim diffuses the light 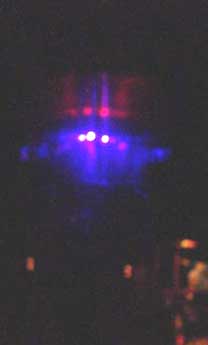
|
|
REWIRING INCANDESCENT CHRISTMAS LIGHT SOCKETS FOR LEDs
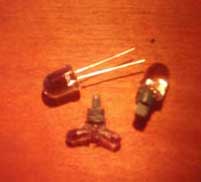
Start by clipping the individual lamp-socket units out of the 120 volt light strings, just as you did for the LEDs above. Dump them into a tub as you cut them out of the string. The incandescent lamp unplugs from the socket. The incandescent bulb rips out of the plug, and the LED (or cluster of LEDs) replaces it.
BEWARE: not all sockets are completely compatible with all plugs!!! The parts may look the same to you, but parts from different manufacturers NOT work in some combinations, so do not mix parts from different strings. Safest approach is to use plastic tubs (white plastic yogurt tubs are perfect) to keep the pieces from each string together all the way through the manufacturing steps that follow, all the way through to the hot glue.
While you are clipping light units out of strings and someone else is tearing light-plugs out of sockets, and someone else is ripping incandescent lamps out of the plugs, and someone else is stripping off the insulation on the ends of the lead-wires coming from the sockets, have someone precutting the leads of the LEDs to the right length with nail clippers or more appropriate tools, using a fixture of some sort to automate the measurement. I use fancy electronics cutters that have magnetized blades so that I don't get LED leads stuck in my feet after the cut-off ends shoot off the blades on the cutters.
At least one wire of the LED needs to be insulated, to avoid short-circuits if the LED gets accidentally twisted in the socket. Slip a length of the green plastic insulation that you stripped off the green lead wires onto one of the leads.
Stick the LED leads through the plug and out the holes that the incandescent lamps wire's used to exit through and bend them up into the notches in the plug.
  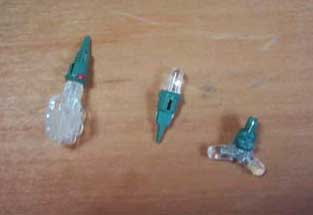
After you install the LED-equipped plug into the socket, you need to test it for functionality and mark the polarity. See POLARITY above.
After each unit has been tested and polarized, I recommend using a drop of hot-melt glue to lock the plug into the socket. Then they can be easily wired into series or parallel strings.
The next installment of this discussion will deal with the brand-new inverted cone emitters

side-emitting LEDs are an idea
based on optics so obvious and so cheap

that I was flat out embarrassed that I had not figured it out years ago.
And of course there are now high powered LUXEON and UFO emitters, and the long-overdue almost-cheap-enough pulse-width modulated power supplies that are finally reaching the market.
These technologies allow dimmable, energy efficient, low-voltage lighting and offer the potential for creating very sophisticated color-adjustment options.
Right now it still feels almost prohibitively expensive, but prices are tumbling. I am embarked on the task of replacing the halogen lighting in my Airstream with LED, Luxeon and UFO lighting.
|